Deploying a face detection application on Google Cloud
Google Cloud
This post describes how to use Alien4Cloud and the Ystia Orchestrator to deploy on Google Cloud a sample application detecting faces and text in an image, using Google Cloud Vision API.
You need to have :
- a Google Cloud Platform account,
- a Google Cloud Platform project already created, as described in Google Documentation.
- this project must have the access to Google Cloud Vision API enabled as described at Enable the Vision API.
Once done, you can start installing the setup as described in the following sections.
- Start Alien4Cloud
- Start the Ystia Orchestrator
- Configure Alien4Cloud to use the orchestrator
- Deploy the application
- Use the application
Start Alien4Cloud
To perform a standard installation of Alien4Cloud, see Alien4Cloud Getting started guide.
Here, we will rely on docker to run Alien4Cloud, using this command :
docker run -d --name a4c -p 8088:8088 alien4cloud/alien4cloud
Or if you are using a HTTP proxy, this proxy needs to be known by Alien4Cloud for some operations like importing in Alien4cloud archives from an external web site.
This proxy setting can be defined in Alien4Cloud through the environment variable JAVA_EXT_OPTIONS, like this:
docker run -d --name a4c \
    -p 8088:8088 \
    -e JAVA_EXT_OPTIONS="-Dhttp.proxyHost=10.1.2.3 -Dhttp.proxyPort=8080 -Dhttps.proxyHost=10.1.2.3 -Dhttps.proxyPort=8080 -Dhttp.nonProxyHosts=\"127.0.0.1|10.11.12.13|10.20.*\"" \
    alien4cloud/alien4cloud
Logs can be seen running this command :
docker logs -f a4c
Once the log below appear :
INFO Bootstrap:57 - Started Bootstrap in 46.171 seconds (JVM running for 47.79)
Alien4Cloud is ready. You can login at http://localhost:8088 as admin/admin.
Start the Ystia Orchestrator
Before starting the orchestrator, the following preliminary steps need to be performed.
Prerequisites
Generate SSH keys
The orchestrator will need a ssh private key that will be used to ssh on Virtual Machines created on demand.
Generate private/public keys in a directory $HOME/yorcdir that will be later mounted on the
orchestrator docker container, running (to keep the configuration simple, don’t enter a passphrase here, even if it is supported) :
$ mkdir $HOME/yorcdir
$ ssh-keygen -t ed25519 -f $HOME/yorcdir/yorckey
Generating public/private rsa key pair.
Enter passphrase (empty for no passphrase):
Enter same passphrase again:
Your identification has been saved in yorcdir/yorckey.
Your public key has been saved in yorcdir/yorckey.pub.
...
Get Google Service Account keys file
The orchestrator will have to authenticate against Google Cloud Platform.
For this, you need to download a service account keys file. This can be done from Google Cloud console at https://console.cloud.google.com/apis/credentials/serviceaccountkey.
Or using gcloud CLI, you can run the following command to get your default service account :
$ gcloud iam service-accounts list
NAME                                    EMAIL
Compute Engine default service account  my-user@developer.gserviceaccount.com
And then create a keys file $HOME/yorcdir/gcloudkeys.json running :
gcloud iam service-accounts keys create \
    --iam-account my-user.gserviceaccount.com \
    $HOME/yorcdir/gcloudkeys.json
This file is created under directory $HOME/yorcdir as this directory will be mounted on the orchestrator docker container, so the orchestrator can access it to authenticate against Google Cloud Platform.
Run the Orchestrator
Here, like previously with Alien4Cloud, we will rely on docker to run the orchestrator. For a standard installation, see Ystia Orchestator installation. For an HA installation, see Ystia Orchestator High Availability installation.
The orchestrator needs to have details on the infrastructures it can use to create Virtual Machines on demand. For Google Cloud, the orchestrator needs to know :
- the Google Cloud Platform Project ID
- the path to (or content of) Google Cloud service account keys file that we created above.
The project ID is available as well in the service account keys file. You can get it running :
$ grep project_id $HOME/yorcdir/gcloudkeys.json
  "project_id": "my-gcloud-project1",
The path to gcloudkeys.json is the path as seen from the container once
$HOME/yorcdir will be mounted on the container.
So if we mount $HOME/yorcdir on /etc/yorc on the container,
the path to the service account file will be: /etc/yorc/gcloudkeys.json.
These values, project id and path to service account file, can be provided
through the environment variables YORC_INFRA_GOOGLE_PROJECT and YORC_INFRA_GOOGLE_APPLICATION_CREDENTIALS in the docker run command.
So the orchestrator can be run using this command :
docker run -d \
    -e YORC_INFRA_GOOGLE_PROJECT=my-gcloud-project1 \
    -e YORC_INFRA_GOOGLE_APPLICATION_CREDENTIALS=/etc/yorc/gcloudkeys.json \
    -v $HOME/yorcdir:/etc/yorc \
    -p 8800:8800 \
    --name yorc \
    ystia/yorc
Logs can be seen running this command :
docker logs -f yorc
Finally, to be able to use the ssh private key file, this file has to be owned by the user used to run the orchestrator, and has to be read-only for this user.
To have the expected ownership and permissions, run the following commands :
docker exec -it yorc chmod 400 /etc/yorc/yorckey
docker exec -it yorc chown yorc:yorc /etc/yorc/yorckey
Update as well the service account file owner and permissions:
docker exec -it yorc chmod 400 /etc/yorc/gcloudkeys.json
docker exec -it yorc chown yorc:yorc /etc/yorc/gcloudkeys.json
Configure Alien4Cloud to use the orchestrator
Now that Alien4Cloud and the Orchestrator are up and running, the following actions need to be performed in Alien4Cloud :
- Upload the Ystia Orchestrator plugin in Alien4Cloud
- Create, configure, enable the orchestrator in Alien4Cloud
- Create a Google Cloud location for this orchestrator in Alien4Cloud
- Create and configure on an on-demand compute resource.
This can be done using Alien4Cloud UI or REST API.
Scripts are available in the Ystia Alien4Cloud Orchestrator plugin repository for each step, for simplicity.
On the host where you installed docker and used docker run to start the
Alien4Cloud container, get these scripts running:
git clone https://github.com/ystia/yorc-a4c-plugin.git
cd yorc-a4c-plugin/alien4cloud-yorc-plugin/src/test/scripts/
chmod a+x *
Upload the Ystia Orchestrator plugin running the following script.
This will by default upload the Ystia Orchestrator plugin version 3.0.0 on Alien4Cloud at http://localhost:8088, see script usage using subcommand --help if you need
to use other values than these default values:
$ ./upload_yorc_plugin
Downloading the plugin...
  % Total    % Received % Xferd  Average Speed   Time    Time     Time  Current
                                 Dload  Upload   Total   Spent    Left  Speed
100   624    0   624    0     0    690      0 --:--:-- --:--:-- --:--:--   690
100  217k  100  217k    0     0    97k      0  0:00:02  0:00:02 --:--:--  236k
Plugin uploaded in Alien4Cloud
Create the Ystia Orchestrator in Alien4Cloud:
$ ./create_orchestrator
Orchestrator created in Alien4Cloud
Configure the orchestrator.
You need to pass in argument the URL of the orchestrator, that will be accessed by Alien4Cloud. You cannot pass http://localhost:8800 as the localhost within the docker container running Alien4Cloud is not the localhost of the Host running the orchestrator container.
You should get your Host IP address running ifconfig for example (but you could use instead the IP address of the container running the orchestrator, from this command: docker exec yorc ip a).
If for example this host where you used the docker run command to run the orchestrator has the IP address 10.1.2.3,
the following command can be run to configure the orchestrator in Alien4Cloud:
$ ./configure_orchestrator --yorc-url http://10.1.2.3:8800
Orchestrator configured in Alien4Cloud
Enable the orchestrator :
$ ./enable_orchestrator
Orchestrator enabled in Alien4Cloud
Create a Google Cloud location for this orchestrator :
$ ./create_location
Location Google of type 'Google Cloud' created
Create and configure on an on-demand compute resource on this location.
By default, this will configure the use of a CentOS 7 image for Compute Instances, with a predefined user yorcuser.
Mandatory parameters are :
- the Google zone where to create Compute instances,
- the content of the public key to configure on this Compute instance
- the path to private key (accessible from the orchestrator container with the right owner and permissions as set above) used by the orchestrator to ssh on this Compute Instance
PUBLIC_KEY_CONTENT=`cat $HOME/yorcdir/yorckey.pub`
./create_on_demand_google_compute \
    --zone europe-west1-b \
    --public-key "$PUBLIC_KEY_CONTENT" \
    --private-key-file /etc/yorc/yorckey
Deploy the application
The sample application we will deploy detects faces and text in an image.
This application is using these Google Cloud APIs:
- Cloud Pub/Sub to be notified of new images uploaded in Cloud Storage
- Cloud Vision to detect faces and text in an image
- Cloud Storage to download images from an input bucket and upload transformed images to an output bucket
so that when an image is added by the user in a input cloud storage bucket, the application is notified of the upload. The application will then call the Cloud Vision API to request the detection of:
- faces
- likelihood of expressions on these faces
- text
- links to similar images on the Web
- labels
Once the response is provided, the application will create a copy of the image and will update it to surround faces and text according to the coordinates returned by the Vision API. A result page will be created, stored in an output cloud storage bucket and made publicly available.
This picture describes the flow :
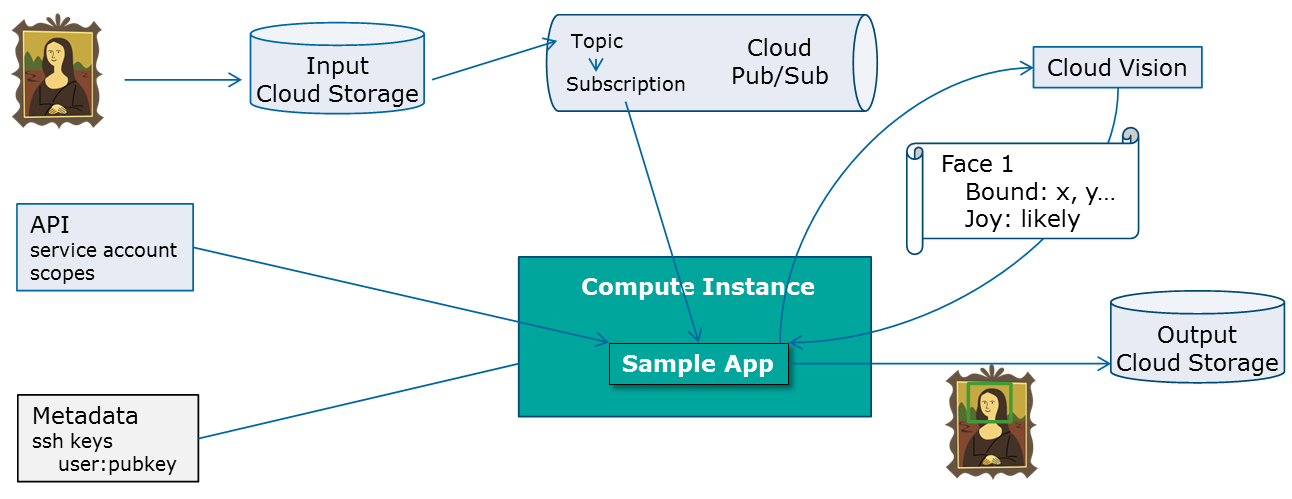
Prerequisites on Google Cloud Platform
As described above, the application is listening to notifications of new images uploaded in an input Cloud Storage, and is publishing the result in an output Cloud Storage.
These entities must be created on Google Cloud before deploying the application. This can be done from the Google Cloud Console or using Google CLIs gcloud and gsutil.
First, create an input and output storage buckets (you need to provide unique names):
gsutil mb gs://my-vision-input
gsutil mb gs://my-vision-output
A Cloud pub/sub topic and subscription must be created so that the application can be notified of images uploads in the input storage bucket:
gsutil notification create -f json -t my-vision-topic gs://my-vision-input
gcloud beta pubsub subscriptions create my-vision-input-sub --topic=my-vision-topic
Once this is done, you are ready to deploy the Application.
Up until now, scripts making use of the Alien4Cloud REST API to were run to perform operations.
Next sections describing how to create and deploy an application, will show both ways
- either using Alien4Cloud UI,
- or using Alien4Cloud REST API.
Next section describes how to create and deploy the application using the UI. You can directly go to next section to create and deploy the application using scripts.
Create and deploy the application using Alien4Cloud UI
We will start by first uploading required types and topology template (description of components making the application, and relationships between these components) in Alien4Cloud.
Import types and templates definitions
The Alien4Cloud Ystia Orchestrator plugin git repository provides types and template definitions for our application in directory tosca-samples/org/ystia/yorc/samples/vision.
We will upload these elements in Alien4Cloud using the UI.
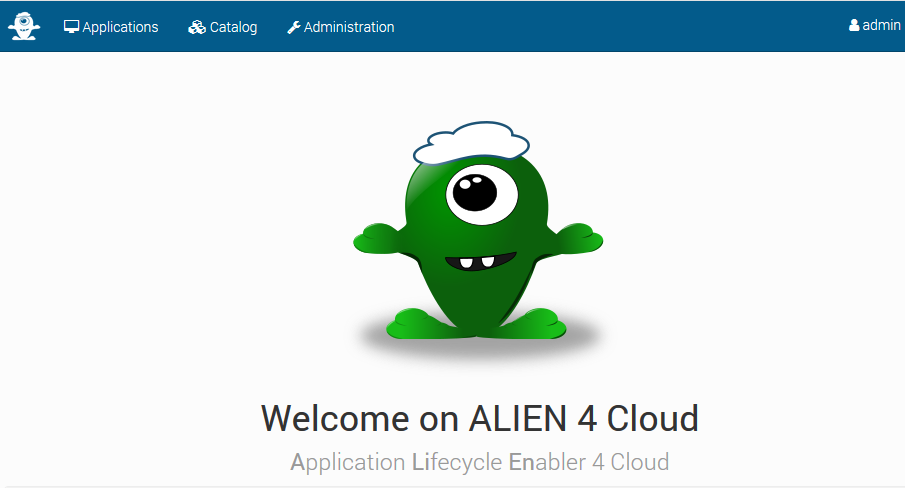
Open a web browser on http://localhost:8088 and login as admin/admin.
This page appears :
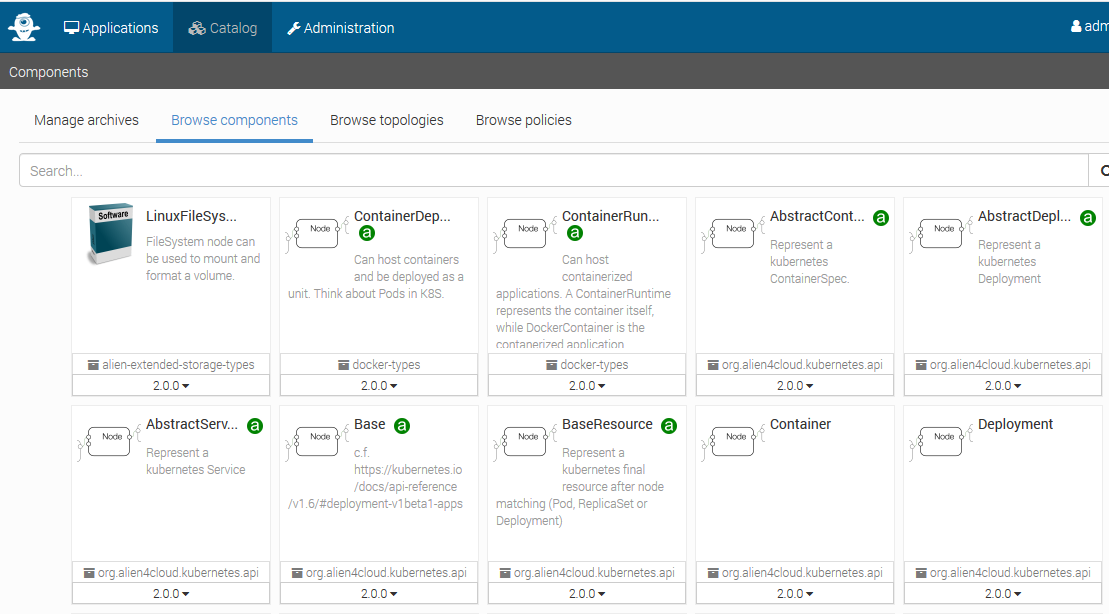
Select tab Catalog. A page appears showing a list of components already present
in the catalog, brought by Alien4Cloud and the Orchestrator :
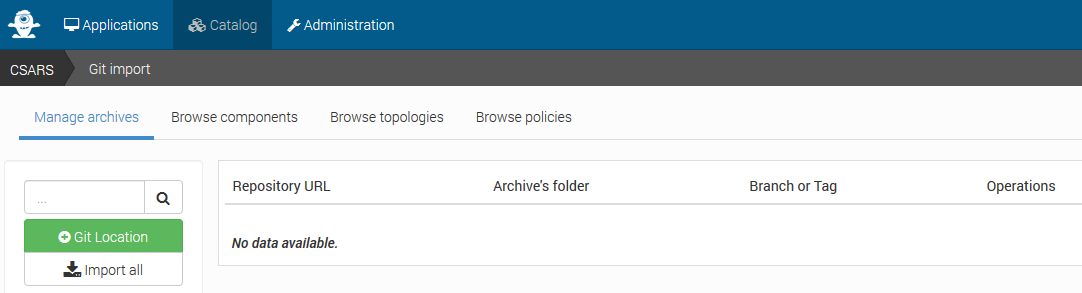
Click on tab Manage Archives. This page appears:
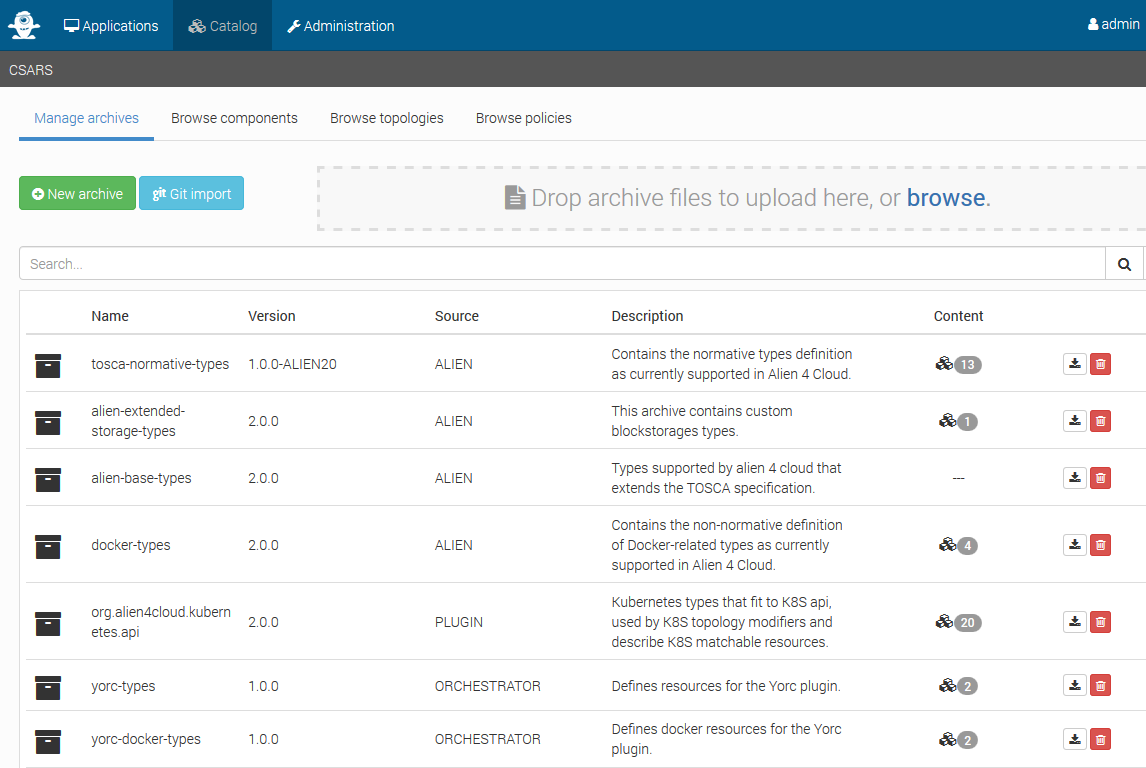
Its lists archives provided by Alien4Cloud and the Orchestrator. You can upload your zipped archives from here, or import a git repository as we’ll do below.
Click on Git import. The following page appears:
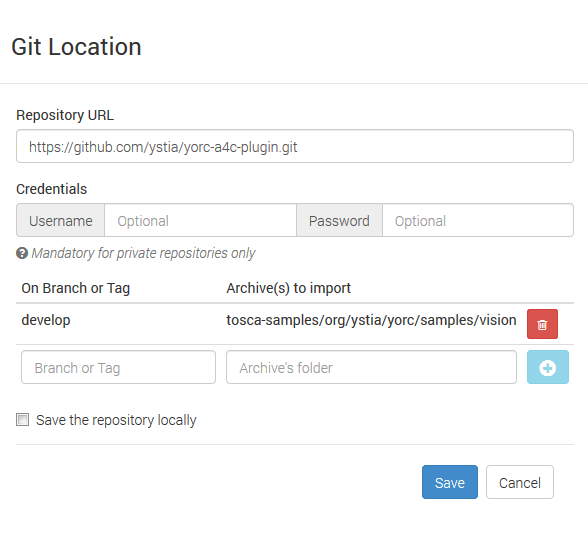
Click on Git location to define a git location. A popup appears where you
need to provide the following inputs:
- Repository URL:
https://github.com/ystia/yorc-a4c-plugin.git - Branch:
develop - Archive(s) to import :
tosca-samples/org/ystia/yorc/samples/vision
Then click on + to add this branch/archive, to have finally this definition (no need to define credentials here):
Click on Save. The following git location appears in the Archives page :
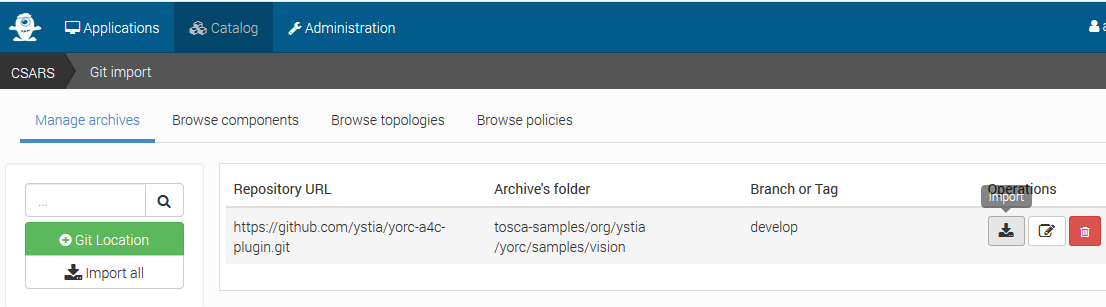
Click on the operation Import to perform the import, it will take some time,
and finally provide this result on the Archive page when the import is successful:
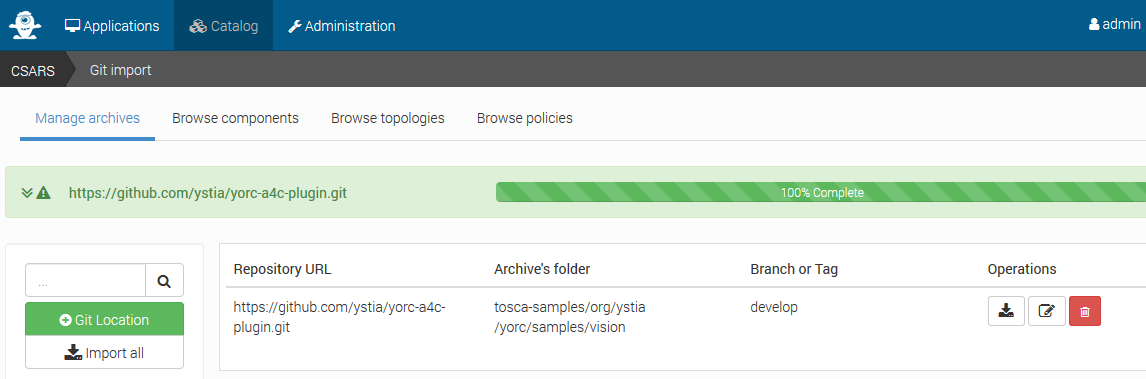
Components and topology template needed fro the application are now uploaded in the Alien4Cloud catalog.
Clicking on tab Browse topologies, you can see the topology template that
was just imported :
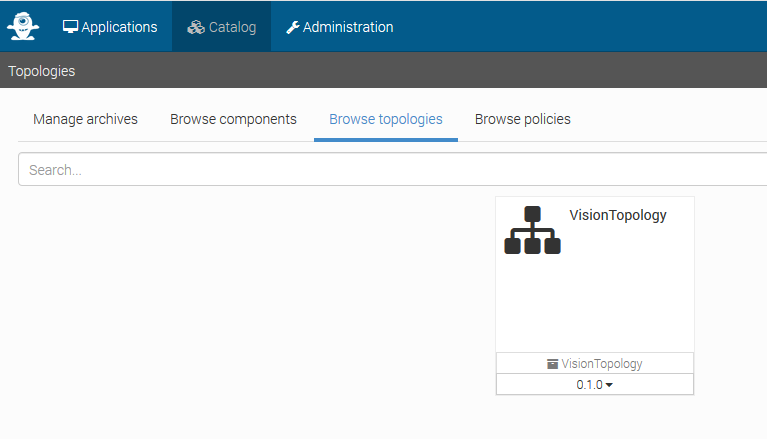
Now that types and topology template VisionTopology (version 0.1.0) are
available in Alien4Cloud, we can create an application from this topology template.
Create the application
From Alien4Cloud home page at http://localhost:8088:
Select tab Applications in the upper left corner. This page appears:
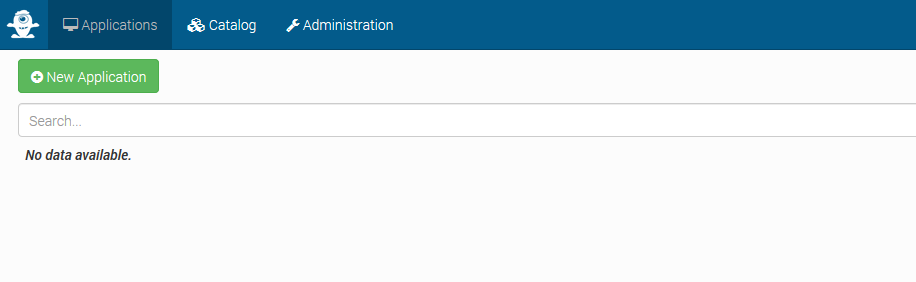
Click on New Application. A window pops up where you can specify:
- the name of the new application to create, here
ImageDetection - Initialize the topology from a Topology Template
- and select the topology template
VisionTopologythat was imported above.
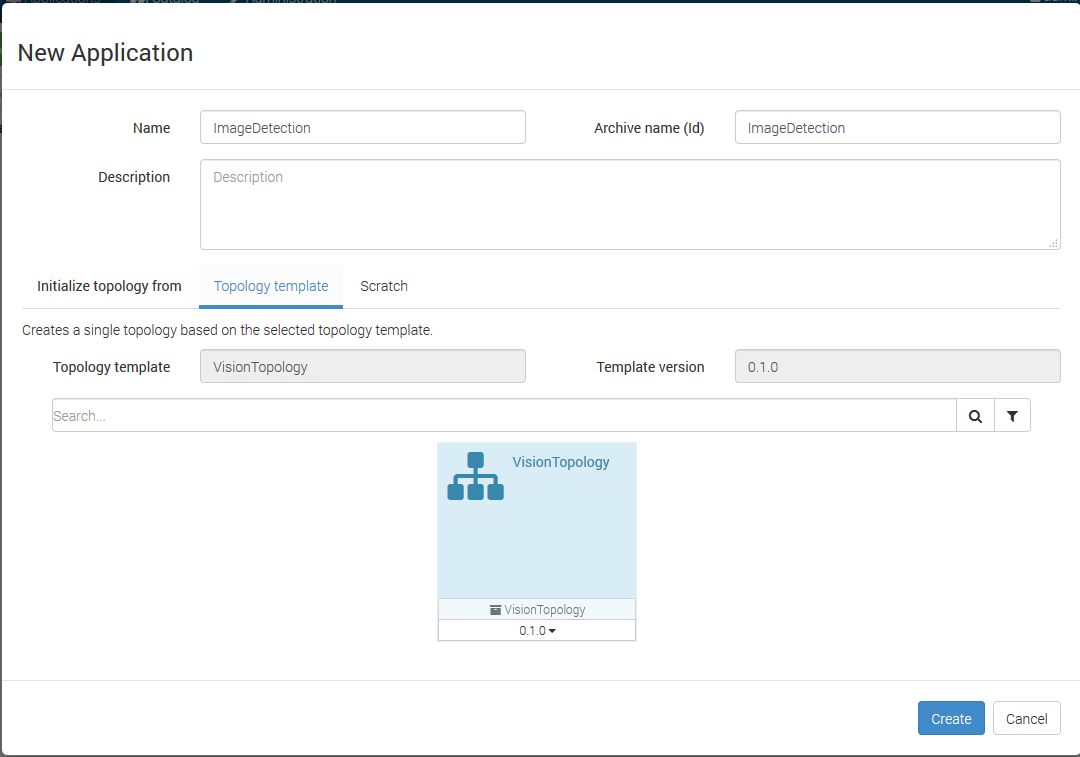
Click on Create. The following page appears, where you can see the application
created :
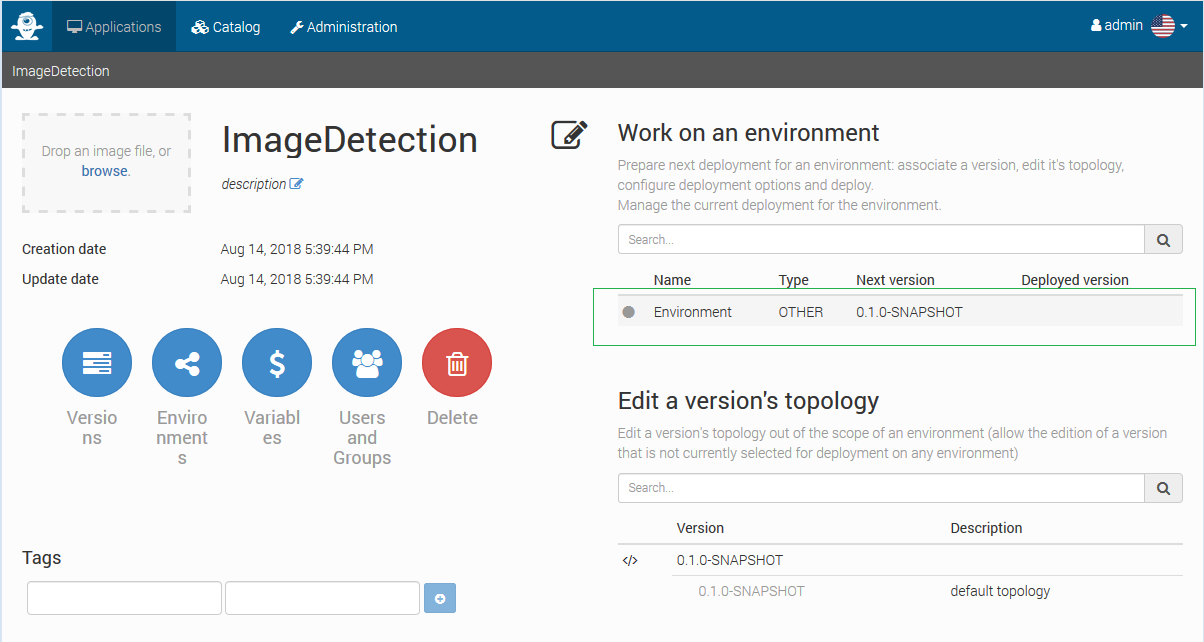
Click on the environment (area surrounded by a green rectangle above). The following page appears:
Select the Topology tab to check the application topology :
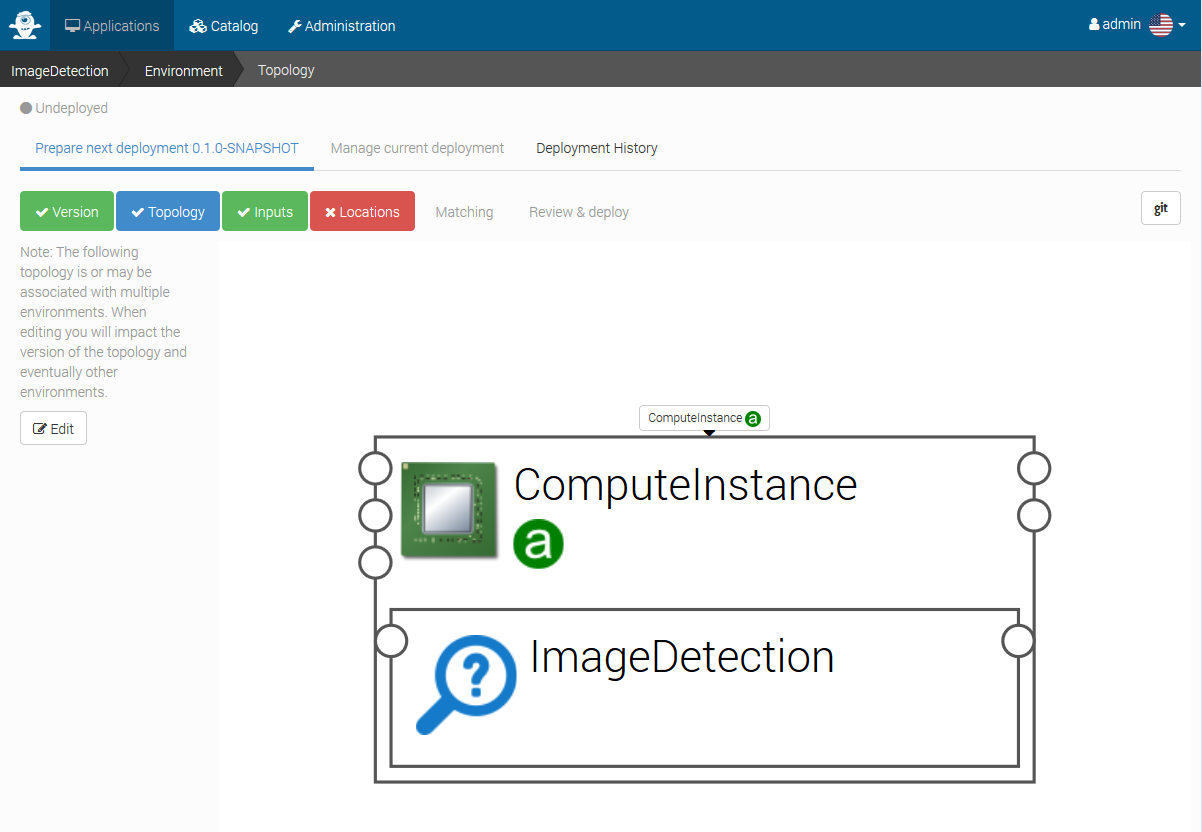
We can see above that it consists in a Compute Node ComputeInstance that will
be created on demand, and an application ImageDetection that will be deployed
on this Compute Node.
Select tab Inputs. The following page appears where you need to provide your
inputs for the application :

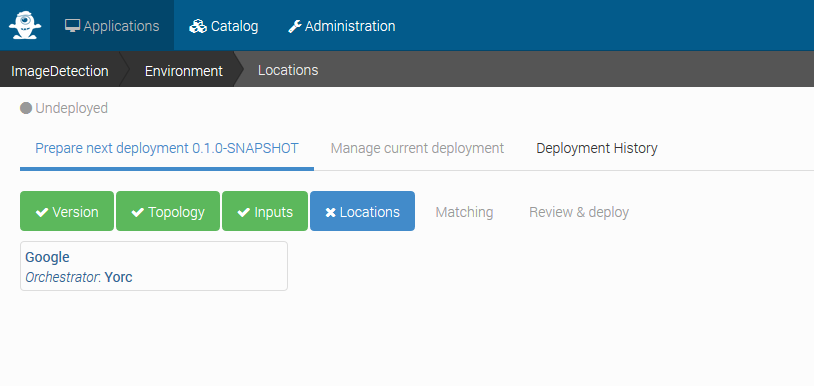
Select tab Locations, and select the Google Location like below :
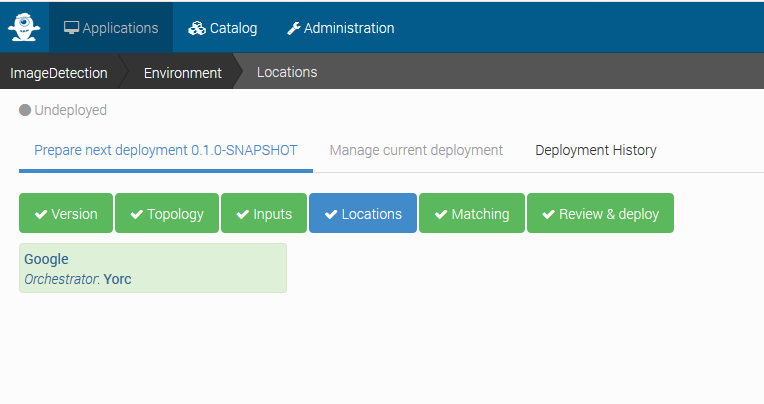
Once done, select tab Review & deploy. The following page appears :
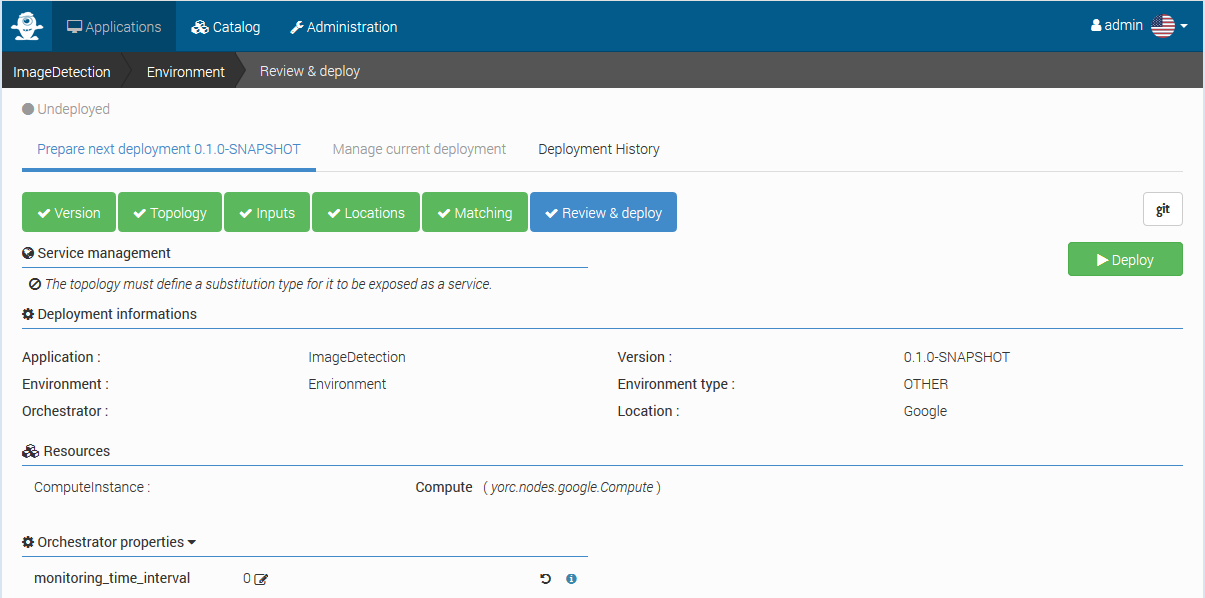
Click on Deploy. The following page showing the deployment in progress appears:
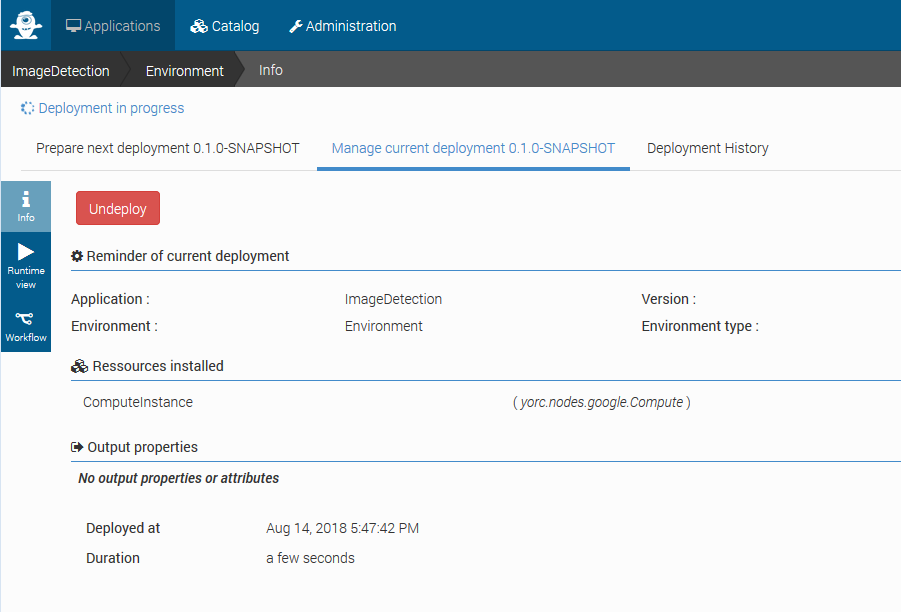
You can click on the Runtime view on the left-hand side to see the current status
of components deployment from their color. Here the ComputeInstance component is up and running,
while the ImageDetection application is being installed:

An Alien4Cloud premium version allows to see deployments logs from the UI.
Here, the open source version does not provide this feature. But you can still use the orchestrator CLI to get deployment logs, running :
docker exec -ti yorc yorc d logs -b ImageDetection-Environment
Back to Alien4Cloud UI, clicking on Info on the left-hand side, we go back to the previous page, that will show the status Deployed when the application will be deployed, like below :
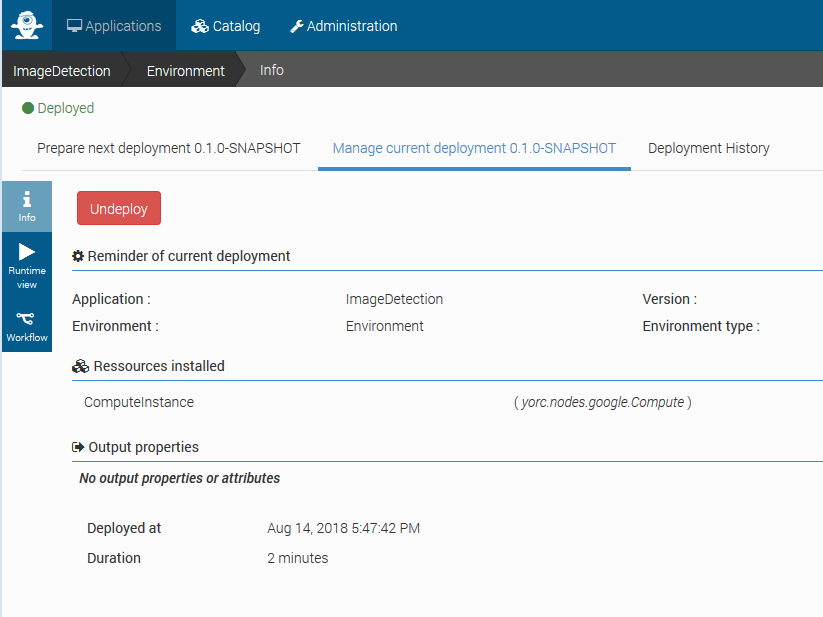
The application is deployed now, it is listening to notifications of file uploaded in your input storage bucket.
You can skip next section describing how to create the application through the REST API, and go to last section on how to use the application.
Create and deploy the application using Alien4Cloud REST API
If you did not follow previous section to create the application from the UI, this section will allow you to create the application from scripts using the REST API.
We will start by first uploading required types and topology template (description of components making the application, and relationships between these components) in Alien4Cloud.
Import types and templates definitions
The Alien4Cloud Ystia Orchestrator plugin git repository provides types and template definitions for our application in directory tosca-samples/org/ystia/yorc/samples/vision.
Upload these elements in the Alien4Cloud catalog running this command:
$ ./import_archive \
    --repository https://github.com/ystia/yorc-a4c-plugin.git \
    --path tosca-samples/org/ystia/yorc/samples/vision
Archive created, proceeding to the import...
Archive imported
This will import types and a template definition (called Topology template) named
VisionTopology (version 0.1.0) in the Alien4Cloud catalog.
Create the application
The following scripts will perform the actions of creating, configuring and deploying an application, using the REST API.
First, create the application:
$ ./create_application --name ImageDetection \
    --template VisionTopology --version 0.1.0
Application ImageDetection created
This application has mandatory inputs that must be provided:
- the Google Cloud Project ID
- the Google Cloud Subscription providing notifications of image uploads
- where to place results
- a path to the keys file needed to authenticate against Google API
The following script can be run to provide input parameters as key=value pairs to the application:
$ ./set_application_inputs --application ImageDetection \
    --inputs "project_id=my-gcloud-project1 subscription_id=my-vision-input-sub output_bucket_name=my-vision-output api_keys_file=/etc/yorc/gcloudkeys.json"
Input parameters set on Application ImageDetection
Then, you have to select where you want to deploy the application, here this script will select the Google Cloud location that was created above:
$ ./select_application_location  --application ImageDetection \
    --location Google
Selected location Google for application ImageDetection
The application can now be deployed.
This command will deploy the application, which will consist first in creating a compute instance, then in deploying the application on this compute instance created on demand (it should take several minutes):
$ ./deploy_application --application ImageDetection
Application ImageDetection deployment in progress..............
Application ImageDetection deployed
The application is deployed now, it is listening to notifications of file uploaded in your input storage bucket.
The application can now be used to detect faces and text in images that will be uploaded, as described in next section.
Use the application
Upload an image containing faces or text in this input storage/bucket,
either through the Google Cloud console, or using the gsutil cp CLI, and 30
seconds/1 minute later, you should see in your output storage bucket a new
subdirectory containing an html result page, with an associated public link on which you can click to see the detection results.